While I have been away vacationing with my family, grandkids and all, you have been stitching away on your Painted Daisy Quilt. I would love to be a mouse in your sewing room seeing your fabric combination that you chose for this great traditional quilt. The instructions for this week will involve putting the multiple borders on the quilt. I have a few tried and true tips for putting on borders to keep the quilt “square” and not stretching or distorting the borders. I also have a few opinions about batting selection to pass onto you.
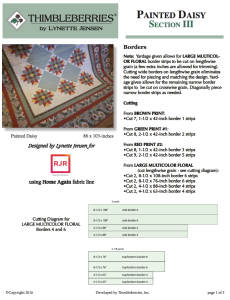 Painted Daisy Section III
The following steps were a mainstay at the Thimbleberries Design Studio and many quilts over the years were successfully completed for photography and trunk shows using this method.
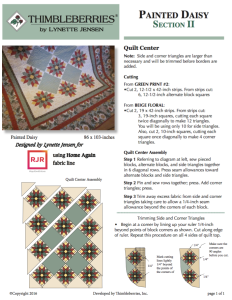
Step 1…With pins, mark the center points along all 4 sides of the quilt. For the top and bottom borders, measure the quilt from left to right through the middle. This measurement will give you the most accurate measurement that will result in a “square” quilt.
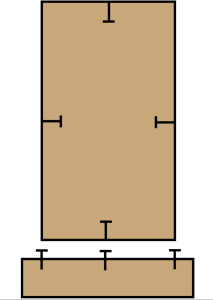 Step 2…Measure and mark the border lengths and center point on the steps cut for the borders before sewing them on. Often the border lengths given in the instructions are cut a bit longer than needed to give the opportunity to trim and “square off” perfectly on each border attachment.
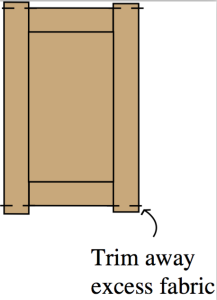
Step 3…Pin the border strips to the quilt matching the pinned points on each of the borders AND the quilt. Pin borders every 6 – 8 inches easing the fabric to fit if necessary. This will prevent the borders and the quilt center from stretching while you are sewing them together. Stitch a 1/4-inch seam. Press the seam allowance toward the borders. Trim off excess border lengths using a large acrylic square or a long acrylic ruler. Use all the marks on the ruler to line up seams etc. to keep border ends “square” and accurate.

Step 4…For the side borders, measure your quilt from top to bottom, including the borders just added, to determine the length of the side borders.
Step 5…Measure and mark the side border lengths as you did for the top and bottom borders.
Step 6…Pin and stitch the side border strips in place. Press and trim the border strips in with the borders just added.
 Step 7..If your quilt has multiple borders, measure, mark and sew additional borders to the quilt in the same manner.
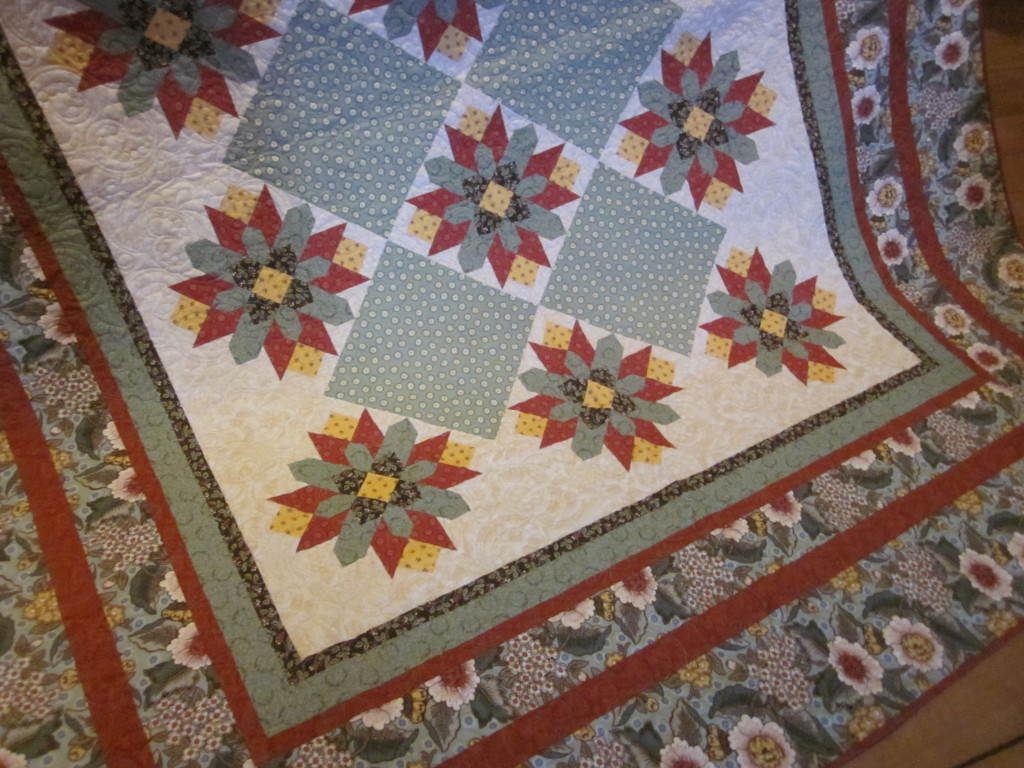
This attention to detail on all the multiple borders in your Painted Daisy quilt will produce a perfectly finished quilt top. These steps are very helpful especially when making wall quilts to keep all outside measurements accurate. When borders get stretched, it is so obvious when a quilt is hung on the wall.
BATTING CHOICE
The availability or many high quality batting products has really exploded over the years. In the past, we didn’t have so many choices. We had cotton or very poor, puffy polyester. Now there are beautiful blends, silk, wool, bamboo and yes, even high quality polyester. The choice is probably very personal, meaning how lofty or how flat you like your finished quilt to be. Now, all of my quilts are machine quilted by long arm quilting artists. I will cherish my hand quilted quilts from the past, but now the reality is machine quilting for me. I am so pleased with the results as well as the convenience and speed, that there is no going back to the quilting frame for me. For those of you who still love the process of hand quilting…hats off to you. But for most of us, machine quilting by a long arm quilter or on a home sewing machine seems to be the norm. I find quilts machine quilted with 100% cotton batting are too dense for my taste, and sometimes too stiff and heavy because of the weight of the thread that has been added to the surface of the quilt. I have mentioned many times before, my family likes floppy quilts. My preference is a 20/80 blend or even a pure, light polyester. I am still really fond of Hobbs Poly Down. I like the light loft it gives the quilting design in the spaces between the stitching. The loft casts a slight shadow that in turn highlights the quilting design. The line of quilting stencils that I designed for Quilting Creations International were designed to all work for the machine quilter as well as the hand quilter. And they have been digitized for the long arm quilting industry as well. You might want to check the Thimbleberries Stencil Designs available from quiltingcreations.com. The block and border designs were designed specifically for the most standard block and border designs I use in most of my pattern designs. Check them out if you haven’t already.
In most cases, my preference is to use a thread color that is neutral and blends with the the fabrics of the quilt top so the actual stitches are secondary to the quilting design quilting. The exception, is of course, when decorative threads are part of the final design decision. So far, that hasn’t happened on my quilts, but I have seen many beautiful quilts done with vibrant thread colors and a variety of thread fiber content. If you need to change colors to blend with high contrasting fabrics used in the top and you do not want the change in the stitching to show on the back side, plan on using a print on the back of your quilt so that the change in thread will not be noticeable. It will be a more attractive quilt back and could also be used a a reversible quilt if the backing fabric is chosen with that in mind. It is always good to get double use from your quilt…especially a large bed quilt.
I hope your have enjoyed our quilt along. I am working on a few more for my upcoming fabric collections, Autumn Landscape and Christmas Remembered which will be available in quilt shops this late spring.